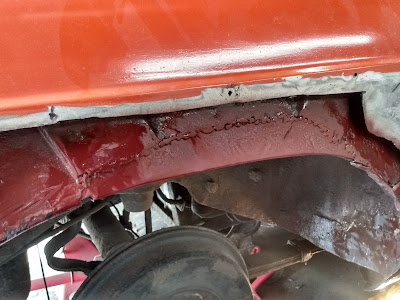
One of the repair panels I had fitted about 22 years ago had rusted quite badly. I found this strange as all the other panels I had replaced at the same time showed no rust at all. Time to investigate.
Here you can see the nasty rust after a little poking with a screwdriver. Usually when this section has rusted like this, the sill behind it has rusted even more.
I ordered this repair panel, as I expected this would be large enough to cover the repairs .This is what I found after cutting away the outer panel. Not terrible.
But still quite a large part of the sill panel came off before the remainder was thick enough to weld.
This is the repair panel I made for the sill before welding. I mostly use plug welding as this is strong enough and limits heat distortion.
Another repair was made to fix the inner wing where it attaches to the outer wheel arch.
Here both new panels are in place. the sill section is already primered and painted. After the complete repair is done I will smother the resulting hollow section in an anti rust wax.
I thought I was ready to fit the repair section, but a little poking around the wheel arch some more revealed additional rust damage the repair panel would not cover.
Also the inner arch needed some repairs. This is the panel I made for the inner wing.
Repair in place.
I could buy a full lower wing repair panel, but decided to try and make my own. First I made a panel to fit the outer skin. Then I made a separate panel for the wheel arch flange.
I clamped the two panels to the car and tack welded them together to emulate the curves needed and added more tack welds off the car.

After this I could use a flapdisk to flatten the welds. Now I had quite a good repair panel.
I welded the home made repair panel and the panel I bought on to the rear wing with lots of small tack welds without too much distoprtion. Now I had a very strong rear wing. The flange of the wheel arch is much thicker gauge metal than the original now.
Here's the first coat of paint on the car. Yes, there is some dust, so there will be more sanding and more coats of paint later, when this paint has hardenend fully in a few weeks, but it already looks much better than that nasty rust hole.


